When developing Android applications that interact with backend services, developers often face challenges like backend unavailability or incomplete APIs. Using mock data and mock servers can significantly speed up the development process.
Introduction
Imagine we’re building a GitHub app to display user profiles and repositories. The backend team has provided API contracts for these features, but the APIs won’t be available until the weekend. Meanwhile, the management team wants the app ready for testing by the beginning of next week.
Here are the API contracts:
- Get user’s profile
GET /users/{username:String}Response:{ "login": "String", "name": "String", "avatar_url": "String", "bio": "String", "public_repos": Int}- Get user’s repository
GET / users/{username:String}/reposResponse:[ { "id": Int, "name": "String", "html_url": "String", "description": "String", "stargazers_count": Int }]Now, the API will be available by the weekend, but the management team wants the app to be ready for testing on the first day of next week.
Based on the provided contract, we can first create the API service interface:
interface GitHubApiService { @GET("users/{username}") suspend fun getUser( @Path("username") username: String ): GitHubUserResponse
@GET("users/{username}/repos") suspend fun getUserRepos( @Path("username") username: String ): List<GitHubRepoResponse>}Next, we will explore several techniques to handle mock implementations in the Android app, allowing us to deliver an app that meets the timeline.
Implement Mock at API service level
To work without backend APIs, we can implement a mock at the API service level to respond with mock data. With this approach, we can even run the app without an internet connection.
Here is how you can implement a mock from the API service above:
class GitHubApiMock( private val context: Context) : GitHubApiService {
private val gson = Gson()
private fun loadJsonFromAsset(fileName: String): String { return context.assets.open(fileName) .bufferedReader() .use { it.readText() } }
override suspend fun getUser(username: String): GitHubUserResponse { val json = loadJsonFromAsset("mock_user_response.json") return gson.fromJson(json, GitHubUserResponse::class.java) }
override suspend fun getUserRepos( username: String ): List<GitHubRepoResponse> { val json = loadJsonFromAsset("mock_repo_response.json") val listType = object : TypeToken<List<GitHubRepoResponse>>() {}.type return gson.fromJson(json, listType) }}Next, we will create response files in src/main/assets folder:
Add mock JSON mock_user_response.json to handle getUser function.
{ "login": "mocktocat", "name": "The Mocktocat", "avatar_url": "https://avatars.githubusercontent.com/u/583231?v=4", "bio": "This is mock data", "public_repos": 10}Add mock JSON mock_repo_response.json to handle getUserRepos function.
[ { "id": 1, "name": "Hello-World", "html_url": "https://github.com/octocat/Hello-World", "description": "This is your first repository", "stargazers_count": 42 }, { "id": 2, "name": "Spoon-Knife", "html_url": "https://github.com/octocat/Spoon-Knife", "description": "This repo is for demonstration purposes only.", "stargazers_count": 30 }]Finally, add a feature flag to switch environments.
@Module@InstallIn(SingletonComponent::class)object NetworkModule { private const val IS_MOCK_ENABLED = true
// fun provideOkHttpClient(): OkHttpClient // fun provideRetrofit(okHttpClient: OkHttpClient): Retrofit
@Provides @Singleton fun provideGitHubApiService( @ApplicationContext context: Context, retrofit: Retrofit, ): GitHubApiService { return if (IS_MOCK_ENABLED) { GitHubApiMock(context) } else { retrofit.create(GitHubApiService::class.java) } }}With this approach, it is lightweight and does not require any additional dependencies. It is easy to configure and adapt when there are API changes since the mock implementation is constrained by the interface.
Implement Mock using Retrofit MockWebServer
Retrofit’s MockWebServer is a powerful tool when using the Retrofit framework. It allows the device to run a localhost server that can mimic the responses from the backend server.
First, we need to add the mockwebserver dependency.
implementation("com.squareup.okhttp3:mockwebserver:4.12.0")Next, implement the MockServer to respond with mock responses located in assets folder.
object MockServer { private var mockWebServer: MockWebServer? = null private val serverStartDeferred = CompletableDeferred<String>() private val responseMap = mutableMapOf<String, MockResponse>()
fun start(context: Context) { CoroutineScope(Dispatchers.IO).launch { mockWebServer = MockWebServer().apply { dispatcher = object : Dispatcher() { override fun dispatch(request: RecordedRequest): MockResponse { responseMap[request.path]?.let { return it } return MockResponse().setResponseCode(404) } } start(8080) serverStartDeferred.complete(url("/").toString()) } enqueueMockResponse( context = context, fileName = "mock_user_response.json", code = 200, path = "/users/octocat", ) enqueueMockResponse( context = context, fileName = "mock_repo_response.json", code = 200, path = "/users/octocat/repos", ) } }
fun shutdown() { CoroutineScope(Dispatchers.IO).launch { mockWebServer?.shutdown() } }
private fun enqueueMockResponse( context: Context, fileName: String, code: Int, path: String ) { CoroutineScope(Dispatchers.IO).launch { val json = loadJsonFromAsset(context, fileName) val mockResponse = MockResponse() .setResponseCode(code) .setBody(json) responseMap[path] = mockResponse } }
private fun loadJsonFromAsset(context: Context, fileName: String): String { return context.assets.open(fileName).bufferedReader().use(BufferedReader::readText) }
suspend fun getBaseUrl(): String { return serverStartDeferred.await() }}To run and stop localhost mock server, implement this in our Application class.
@HiltAndroidAppclass MyApp : Application() {
override fun onCreate() { super.onCreate() MockServer.start(this) }
override fun onTerminate() { super.onTerminate() MockServer.shutdown() }}Finally, update the dependency code to accept the MockServer URL when the mock is enabled.
@Module@InstallIn(SingletonComponent::class)object NetworkModule {
private const val IS_MOCK_ENABLED = true private const val BASE_URL = "https://api.github.com/"
@Provides @Singleton fun provideRetrofit(okHttpClient: OkHttpClient): Retrofit { val baseUrl = if (IS_MOCK_ENABLED) runBlocking { MockServer.getBaseUrl() } else BASE_URL return Retrofit.Builder() .baseUrl(baseUrl) .client(okHttpClient) .addConverterFactory(GsonConverterFactory.create()) .build() }
@Provides @Singleton fun provideGitHubApiService(retrofit: Retrofit): GitHubApiService { return retrofit.create(GitHubApiService::class.java) }}With this approach, it is fully customized and possible to run without the internet. However, it is quite complicated to set up, and we have to remember to add or remove responses from a path when it is updated. Personally, I find that implementing a mock at the API service level is cleaner since it is constrained by the interface. If any updates are made, the mock implementation should be updated accordingly.
Implement Mock using Charles Proxy
Charles Proxy is an amazing tool that enables developers to view all requests, responses, and the HTTP headers between the client and the server.
It is a tool not just for debugging but also for returning mock responses when needed, by simply pointing the local mapping to dedicated mock files.
Here is an example of local mapping to a local path that contains the mock responses.
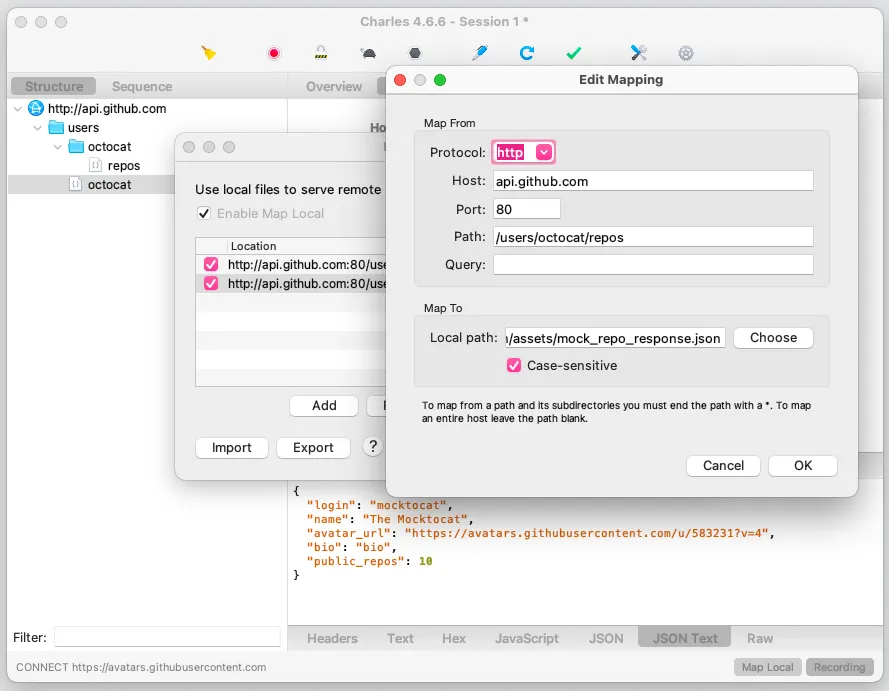
With this approach, we don’t have to make any code changes. However, due to security reasons, it is not practical to map HTTPS routes. Therefore, on the Android app, we should switch to HTTP for easier configuration.
Implement Mock by Creating a Mock Server
This approach involves setting up a server that mimics the behaviors of a real backend server, responding to HTTP requests with mock responses. Personally, I prefer using Node.js and Express, because it is lightweight and easy to setup, making it fast and easy to see the outcome results.
After installing Node.js and Express, move the mock files mock_user_response.json and mock_repo_response.json to the same folder as server.js as shown below.
const express = require('express');const fs = require('fs').promises;const path = require('path');
const app = express();const port = 3000;
// Helper function to read JSON file asynchronouslyconst readJsonFile = async (filePath) => { try { const data = await fs.readFile(filePath, 'utf8'); return JSON.parse(data); } catch (err) { console.error('Error reading file:', err); throw err; }};
// Route for user informationapp.get('/users/:username', async (req, res) => { const username = req.params.username; console.log(`Fetching data for user: ${username}`);
if (username !== 'octocat') { return res.status(404).json({ error: 'User not found' }); }
try { const data = await readJsonFile(path.join(__dirname, 'mock_user_response.json')); res.status(200).json(data); } catch (err) { res.status(500).json({ error: 'Internal Server Error' }); }});
// Route for user repositoriesapp.get('/users/:username/repos', async (req, res) => { const username = req.params.username; console.log(`Fetching repositories for user: ${username}`);
if (username !== 'octocat') { return res.status(404).json({ error: 'User not found' }); }
try { const data = await readJsonFile(path.join(__dirname, 'mock_repo_response.json')); res.status(200).json(data); } catch (err) { res.status(500).json({ error: 'Internal Server Error' }); }});
// Start the serverapp.listen(port, () => { console.log(`Mock server running at http://localhost:${port}`);});To start the mock server, we can simply run the command node server.js.
Next, update the Android code to connect to mock server when the configuration flag is enabled.
@Module@InstallIn(SingletonComponent::class)object NetworkModule {
private const val MOCK_ENABLED = true private const val BASE_URL = "https://api.github.com/" private const val MOCK_URL = "http://192.168.0.105:3000/"
@Provides @Singleton fun provideRetrofit(okHttpClient: OkHttpClient): Retrofit { val baseUrl = if (MOCK_ENABLED) MOCK_URL else BASE_URL return Retrofit.Builder() .baseUrl(baseUrl) .client(okHttpClient) .addConverterFactory(GsonConverterFactory.create()) .build() }}With this approach, it is fully customizable, allowing us to simulate errors from the server, such as responding with invalid JSON data that is not defined in the contract, handling error 500, or handling some edge cases that are impossible to reproduce when the backend server is stable.
Conclusion
In my experience, any developer working on the client side should learn how to implement mock data. These techniques speed up development, enhance testing and debugging, and lead to more robust applications. By using these methods, I have successfully met tight deadlines on various projects. I hope they prove valuable in your development process as well.
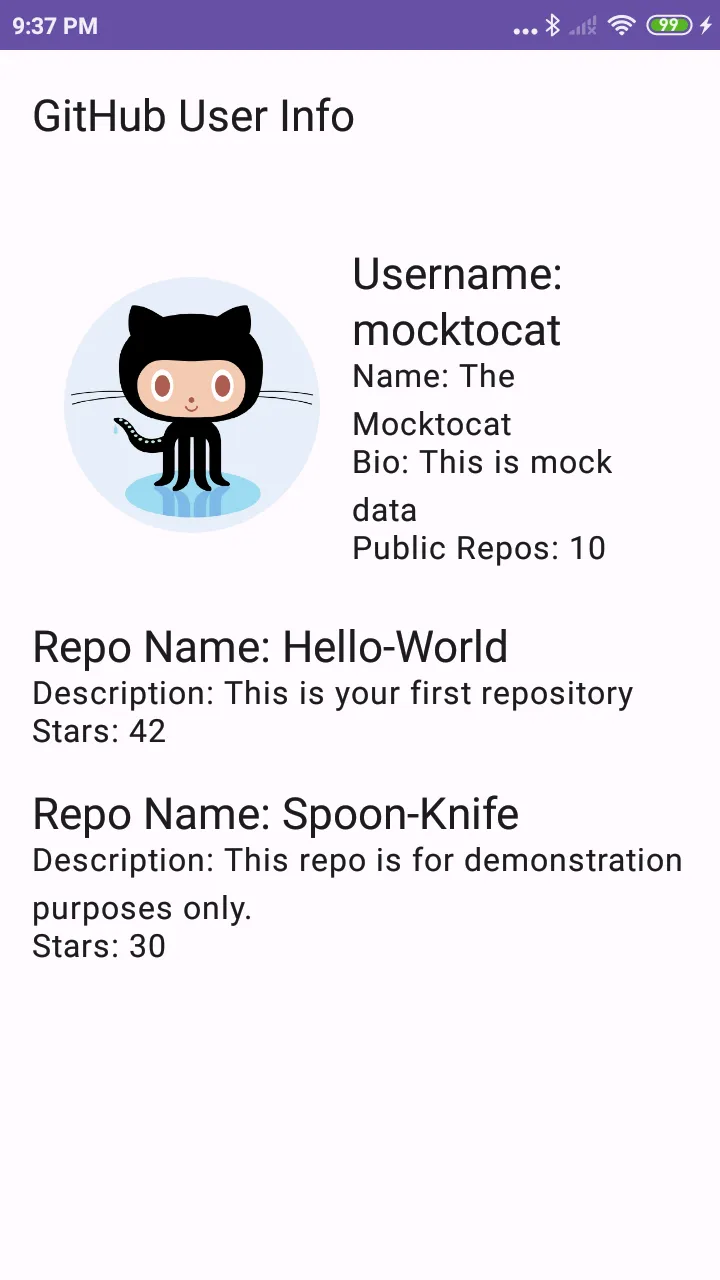
Finally, here is a screenshot of the app with mock data loaded: